December 29, 2008
Cartoon Sin City Effect
Learn the secret to creating incredible cartoon effects using After Effects and Photoshop.
There will be two PDF versions up simutaniosly:
A VFX tut, like this one and a more "serious" and "technical" Tut, like the tracking tutorial.
Plus i will post here some of the cool stuff i learn every day at school or a job..
Download tutorial PDF:
Tutorial pdf
First PDF Session
Tracking controls
This is the first Session on PDF. Learn the basics of the tracker control, as well as some advanced tracking and motion stabilization techniques and some advanced rotoscoping technique.
Download Session here:
Session 1: Tracker Controls
Happy learning
December 28, 2008
Session 3: Fractal Noise
Fractal Noise:
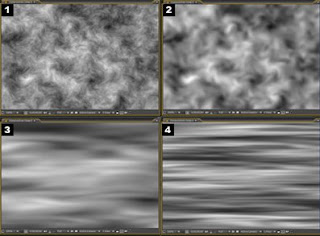
Probably the most powerful built in tool After Effects has. Fractal Noise has so many controls that it's uses are almost unlimited. I have found that i can use fractal noise in almost every project i have made in one way or another.
Basics:
1. On top of any piece of footage start by creating a new layer.
2. Go to effects>noise>Fractal Noise
3. Scale up the fractal noise to 150%
4. Using keyframes make the fractal noise evolve.
5. Set the layer mode to either: screen, overlay, add or any other mode.
And there you go, a easy way to add movement and depth to any picture or footage.
If you are still having trouble grasping the usefulness of this plugin try this project.
Adding Fog/cloud
1. On a new black solid layer, add fractal noise
2. Keyframe evolution
3. Set mode to overlay, to get a cool shadowy effect.
Fog:
Fog is a bit dfferent first:
1. Create a new layer and add ramp effect (Black and white)
2. Set it so that you have black on top and white on the bottom.
3. add Fractal noise
4. Set the blending mode to multiply on the fractal noise
5.And on the layer it's self set it's mode to add
And there you go instant fog!
Keep playing with fractal noise and see what you come up with. If you want to see more of Fractal Noise in action download CINEMA PRO 2 for free at:
Tonyfbaby.deviantart.com
It's full of very useful presets and some use Fractal Noise in very creative ways.
Till next time.
December 23, 2008
Session 2: Animating Text
Animating text is crucial to design. People like to see into a screen and see real life, even if they know it's fake. By that i mean, in real life there is always motion and energy and life. There is a never ending flow of energy, from tree branches sawing to a person's chest moving slightly up and down as they breath. Life never stands still. Same goes for design. Your visual presentation needs to be "alive". Things should move slightly and animate smoothly into screen. It makes for a more dynamic presentation. So to that; here are a few ways to animate your text so that its not bland and boring.
Cascading type
Cascading type allows multiple character to slide into place.
1- Animate /scale/600%
2- Using the fill color, choose a different color for the text.
3- Click the advanced tab.
4- Experiment with the Shapes option.
5- In the START, set the values at start 0/ end 40%. and offset -40%.
6- Set the END to set the values at start 0/ end 40%. and offset 40%.
7- Add Opacity in the START and put on 0%
8- Add Anchor point in the middle of the comp and on the X point at 100% and Y point change to -30%
9- Add motion blur.
10- Add randomize order
Per word animation
1- Animate /add/ Opacity to 0%
2- Change anchor point group to WORD
3- Set the key frames to Start to 0% End to 100%
4- Set group alignment to 0% and -100%
5- Go to the end key frame
6- Set group alignment to 0% and 100%
7- Add rotation and set two key frames. Beginning frame 0,0 and End frame 1,0.
Animate Flowing Text
1- Animate
2- Add blur
3- Unlock and Change to 0, 100
4- In advanced tab, change to RAMP UP
Animate Text on a path
1- Type in your text
2- Choose the pen tool
3- Select the Roto BAZIER
4- Draw a path
5- From the path options, choose Mask1
6- Move the FIRST and LAST margin to move the position of the text.
Wiggling Text
1- Create your text
2- Choose add/fillcolor/ HUE and change to 0x200.0
3- Choose Animate 1 button/selector/ Wiggly
4- Add property/ rotation and set to 20%
To Render Text with Alpha Channel
1- Command M
Use the setting in the snap shot
December 14, 2008
Session 1: TEXT
Most people in the excitement of getting a VFX program, neglect the Text effects. Which are incredibly powerful. A good VFX artist should be familiar with it.
Text tool:
- Text is always by its self on its own layer. This allow blank spaces to be transparent and makes animating text easy. There are many ways to add text to you project.
1. Text tool: Click on the T Shape on the tool bar on top.
- This allows you to both create text and a new layer at the same time.
2. Text layer: Click on Layer>New>Text
- This allows you to create a Text Layer
3.Text Effect: Cilck on effects>Text>basic text
-This is a old school way of adding text as an effect. It lost its appeal with the introduction of
the text tool. However the Text Effect allows you to do things you normally couldn't do. such
as adding timers or countdowns or date stamps.
Animating text:
1- select it and apply a transformation mode to it by choosing ANIMATE on the right side of the text drop down menu in the upper right corner.
2- Click on the arrow to open it and choose one of the transformation modes.
3- Range selector and animate one determines the start and end value of our text location, for example if we choose to move the position property.
4- Only the characters between the range selector are effected b our animation.
ANIMATING TEXT FROM PHOTOSHOP
1- Import layer from photoshop
2- choose layer menu, and select the layer and choose: Convert to Editable Text
3- Double click the layer to make sure the entire layer is selected.
4- option +shift to hide the properties that you want to hide in the layer properties
5- choose position from top/right animate
6- When selecting range selector, you'll notice that there is a bar at the beginning and one at the end of your text.
7- In the range selector, by moving the start key frame you change the selection of your letters for animation
8- Under start, set the first key frame to 0, and set the second key frame in a different place in time to 100
press 0 to preview
9- You can also add Opacity to make the text fade in to to the picture.
Basic Training
1. Videocopilot basic training
2. Creativecow basic tutorials
These websites offer an incredible amount of knowledge. And have a big community which can be helpful if you run into problems and need quick answers.
Basics of After Effects
After Effects along with other famous programs (Nuke,shake,FxHome) is a composting program, by adobe. It was originally created by the Company of Science and Art in 1993. In the same year Company of Science and Art was acquired by Aldus. And by 1994 Aldus was acquired by Adobe Corporation. After Effects is a motion graphics and composting software that offers unparalleled freedom at a reasonable price. The closest competitors to its throne are: Nuke, Shake, Boris RED, combustion, flame, and inferno. Yet for its price range none can offer the variety and freedom of After Effects.
So let's begin.
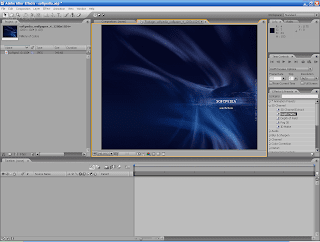
The interface can be dived into 4 major areas. 3 up top and the 1 time line on the bottom. On you top left you have the project and effects tabs. In the middle you have your monitors, and on your right are all you extra tabs, which include: effect finder, text, tools, trackers and more.
To begin on a new project:
1. Click > File> New project
- As soon as you make a new project make sure you save it right away, in a new folder.
Within the new folder add all the media you will be using (audio,video,pictures)
2. Create a new composition, click: Composition>New Composition
- A window will pop out. Here you can set the setting for your project. Depending on where
your final video will be shown, you must set it accordingly.
Here is a Guide:
SD American Television: NTSC DV
HD American Television: HDV/HDTV 720p/29.97
American DVD: NTSC DV WIDESCREEN
Digital Video for Computer or Web: NTSC D1 WIDESCREEN
Unless you have special outputs, these settings should work just fine. If you are doing
projects or tutorials i recommend NTSC d1 Widescreen, unless you have to do it in HD or 2k
or 4k resolutions.
Opening video or other media:
File>import ... or... double click on the project box.
To add your media to your project drag and drop your media into the time line. The best way to keep consistency in your project is to make sure your media matches the settings of you current project.
Rendering out projects:
Ok, so you are finished with a project you want to export it and stick it in a video editing program. But how? Well there are two ways to export a video.
1. File> Export> Quicktime:
This way is the worst way to export because it offers terrible video. So why use it? well sometimes you want to see how your video plays out, or you want to export to a Audio editing program and add sound effects to the video. Thats when you use the export feature.
The problem is that export offers terrible results and very little options. so you use option two.
2. Compisition>add to render queue
This way of exporting uses the Render Queue, which offers more options for rendering video and at a much better quality.
But what settings should you use?
Well the best setting are to use the project settings and render as a Quicktime animation or a AVI lossless. These keep every single bit of data from your video at full resolution and even keeps the alpha. However, the drawback is that they are HUGE. a typical video rendered in QT animation is a about 1GB per minute. Unless you are working on a feature film , the hassle is not worth it.
So there are other options. You can video out as a: QT H264, tiff or Jpeg sequence, mpeg-4 at full quality.
Hopefully you understood the basics of creating and rendering a new project. Stay tune for the next session.