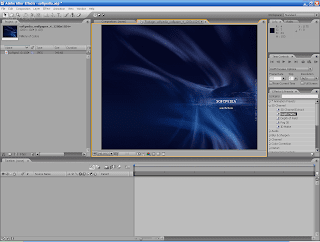
After Effects along with other famous programs (Nuke,shake,FxHome) is a composting program, by adobe. It was originally created by the Company of Science and Art in 1993. In the same year Company of Science and Art was acquired by Aldus. And by 1994 Aldus was acquired by Adobe Corporation. After Effects is a motion graphics and composting software that offers unparalleled freedom at a reasonable price. The closest competitors to its throne are: Nuke, Shake, Boris RED, combustion, flame, and inferno. Yet for its price range none can offer the variety and freedom of After Effects.
So let's begin.
The interface can be dived into 4 major areas. 3 up top and the 1 time line on the bottom. On you top left you have the project and effects tabs. In the middle you have your monitors, and on your right are all you extra tabs, which include: effect finder, text, tools, trackers and more.
To begin on a new project:
1. Click > File> New project
- As soon as you make a new project make sure you save it right away, in a new folder.
Within the new folder add all the media you will be using (audio,video,pictures)
2. Create a new composition, click: Composition>New Composition
- A window will pop out. Here you can set the setting for your project. Depending on where
your final video will be shown, you must set it accordingly.
Here is a Guide:
SD American Television: NTSC DV
HD American Television: HDV/HDTV 720p/29.97
American DVD: NTSC DV WIDESCREEN
Digital Video for Computer or Web: NTSC D1 WIDESCREEN
Unless you have special outputs, these settings should work just fine. If you are doing
projects or tutorials i recommend NTSC d1 Widescreen, unless you have to do it in HD or 2k
or 4k resolutions.
Opening video or other media:
File>import ... or... double click on the project box.
To add your media to your project drag and drop your media into the time line. The best way to keep consistency in your project is to make sure your media matches the settings of you current project.
Rendering out projects:
Ok, so you are finished with a project you want to export it and stick it in a video editing program. But how? Well there are two ways to export a video.
1. File> Export> Quicktime:
This way is the worst way to export because it offers terrible video. So why use it? well sometimes you want to see how your video plays out, or you want to export to a Audio editing program and add sound effects to the video. Thats when you use the export feature.
The problem is that export offers terrible results and very little options. so you use option two.
2. Compisition>add to render queue
This way of exporting uses the Render Queue, which offers more options for rendering video and at a much better quality.
But what settings should you use?
Well the best setting are to use the project settings and render as a Quicktime animation or a AVI lossless. These keep every single bit of data from your video at full resolution and even keeps the alpha. However, the drawback is that they are HUGE. a typical video rendered in QT animation is a about 1GB per minute. Unless you are working on a feature film , the hassle is not worth it.
So there are other options. You can video out as a: QT H264, tiff or Jpeg sequence, mpeg-4 at full quality.
Hopefully you understood the basics of creating and rendering a new project. Stay tune for the next session.


if we want to learn VFX what concepts do we have must learn
ReplyDelete